Saturday 14 May 2016

read all about Mrs. Fieldmouse

Good afternoon Readers,
RE:  Riverbank Farm Kit no 3
A few more storybook snippets for you from the Mrs Fieldmouse kit.  I hope you like….


Kits available from Farrowsisters Etsy store.

Friday 13 May 2016

Mrs. Fieldmouse is very busy today

Good afternoon Readers,
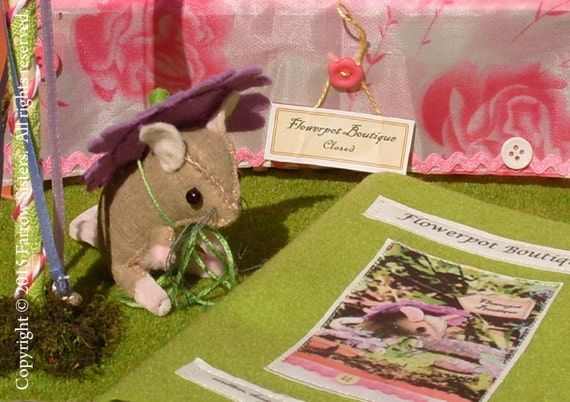
Since it such a lovely summers day Mrs. Fieldmouse is off to harvest some mallow plants for her smoothie recipe.  She'll need to wear her mallow sun bonnet as the sun is scorching today.......


and now she is back at her little 'flowerpot boutique' making some refreshing mallow smoothies.....


She can now look out for passing customers from her roof top terrace.......


read all about Mr. and Mrs. Whiskers

Hello Readers,
RE:  Riverbank Farm Kits no 1 and no 2
Just a little post to give you a few snippets from the two storybooks which are part of kits 1 and 2.

The tales are not lengthy and I do feel that they will get your little ones interested in Mr & Mrs Whiskers.


Now don't forget our Kits available from Farrowsisters Etsy store.


Friday 15 January 2016

Two new kits available to purchase via our Etsy shop:

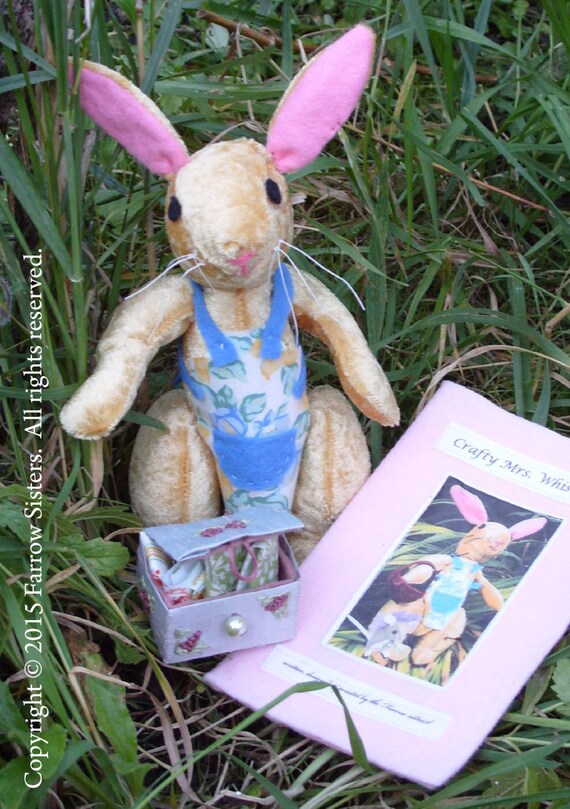
Kit No. 2 is all about 'Crafty Mrs. Whiskers' and is aimed at mums who are interested in making a collectable for their child, with the added bonus of having a storybook that tells a short tale of Mrs. Whiskers.
The kit has all the fabrics and thread inside along with the paper pattern and full instructions for the following items; Mrs. Whiskers (24cm height) and her apron, sewing box, mallow sun bonnet, storybook. 
NB: items not included are stuffing, sewing needles, general sewing & glue.

Collectible Soft Toy Kit, Riverbank Farm Kit No. 2, Mrs Whiskers


Kit No. 3 is all about 'Mrs. Fieldmouse' and is aimed at mums who are interested in making a collectable for their child, with the added bonus of having a storybook that tells a short tale of Mrs. Fieldmouse.
The kit has all the fabrics and thread inside along with the paper pattern and full instructions for the following items; Mrs. Fieldmouse (7cm height), 3 x sun bonnets, storybook. 
NB: items not included are stuffing, sewing needles, general sewing & glue. 

Collectible Soft Toy Kit, Riverbank Farm Kit No. 3, Mrs Fieldmouse


We very much hope that you enjoy these kits and look forward to your comments.

Thursday 24 December 2015

Christmas food gifts

Homemade Parmesan Crackers


Recipe:
Makes approx 72 crackers 


Equipment:
Medium size mixing bowl
Sieve
Rolling pin
Knife
Cheese grater
Baking sheet
Wire rack
6 Jam jars with lids
Dollies, small x 6
Labels
Ribbon

Ingredients:
250 grams self raising flour
Large pinch of salt
Pinch of cayenne pepper
1 tablespoon of black pepper
250 grams unsalted butter
3-4 tablespoons of water
160 grams of freshly grated Parmesan

Method:
Sift the flour into the bowl, add the salt and spices.  Rub in the butter and add enough water to give a firm dough.  Knead the dough on a floured surface and roll out into a rectangle.

Divide the Parmesan into 6 equal amounts. 

*Sprinkle one portion over 2/3 of the rectangle.  Fold the 1/3 that has no Parmesan on it over onto the middle 1/3, now bring the remaining 1/3 of dough over onto the middle 1/3.  Press the sides with the rolling pin to seal them.  Turn the dough by a quarter turn and now press the rolling pin onto the dough 3 times thus forming air pockets.**

Repeat from * to ** until the Parmesan have been used.

Roll the dough out into a rectangle of about 1 inch thickness.  Cut the rectangle into 1 ¼  strips.  Cut each strip into crackers of approx. ¼ inch thickness.

Place the crackers onto the baking sheet and chill for 30 minutes.

Whilst the dough chills put the oven on; Gas mark 7 (220° C).

Cook the crackers on the centre oven shelf for 5 minutes, then remove from the oven, flip them over and put back in the oven for a further 4 or 5 minutes.

Allow to cool completely before putting them into the jars, stick on your label and pretty up the jar lid with the dollie and a nice colourful piece of ribbon. 


Homemade chocolates


Recipe:
Makes approx 72 buttons in total.  This equates to 6 bags of chocolates, each bag containing 4 white, 4 milk and 4 plain button chocolates.


Equipment:
Medium size saucepan
Large heatproof glass bowl
Stirring spoon
Silicone chocolate button mould (purchased from Lakeland)
Teaspoon
Wire rack
Cellophane bags (purchased from Lakeland)
Labels 
Ribbon

Ingredients:
150 gram bars of cooking chocolate: 1 x white, 1 x milk, 1 x plain (350 grams total)
Small bag of miniature marshmallows
50 grams dried cranberry’s, cut in half
50 grams of flaked almonds
50 grams crystallised stem ginger cubes, cut up into thin strips

Method:
Sit the large bowl over a pan filled with a couple of inches of simmering water.  NB: the base of the bowl should not touch the water. 
Break up 70% of the white chocolate bar into the bowl and keep stirring until the chocolate has melted.
Remove the bowl from the pan.  Break up the remaining 30% of white chocolate and put it into the bowl of melted chocolate.  Stir the chocolate until it has melted and has a smooth consistency.
Put the mould onto the wire tray and fill each button recess with 4 or 5 marshmallows.  Now using the teaspoon, spoon chocolate into each button.  Once filled I tend to poke the marshmallows around in the chocolate with a cocktail stick to make sure the chocolate get to all the areas of the button shape.  Now carefully lift the mould off the work surface by about 4 inches and drop it, this should bring any air bubbles up to the surface to disburse.
Place the filled mould in the fridge to set. 

Repeat the above using:
milk chocolate with cranberries and almond
plain chocolate with ginger


Once the chocolates are thoroughly set push them out of the mould and pop into the cellophane bags and seal with the wire twist.  Stick on your label and pretty it up with a nice colourful piece of ribbon.


Monday 30 November 2015

Quince Vodka


I'm the middle one of the three Farrow Sisters - and my real passion apart from crafting is also growing and making things which are either for eating or drinking.   I was lucky enough to be given some quinces a couple of weeks ago and decided to have another go at making some quince vodka - went down very well last year with a splash of tonic, especially on a cold winters evening when relaxing by the fire.  The rest of the quinces will be used to make spiced quinces which are also another Christmas favourite - an excellent accompaniment with hot or cold ham, pork and strong cheese.


RECIPE for Quince Vodka
Ingredients:
1 large quince, washed and grated
650ml vodka
200gms vanilla caster sugar or ordinary sugar is okay (I add a vanilla pod to my sugar jar to get the flavour)
Jar with lid large enough to hold all the ingredients. 

Method:
Place the grated quince into the jar along with the sugar and vodka.  Put the lid on and shake daily until Christmas - it does improve if you can manage to keep it longer !!


Friday 20 November 2015

welcome to our first blog page

Now WHERE shall we begin?  Well we have been crafting away quietly for many years and after having thoroughly enjoyed making things for our friends, family and our homes we've decided to finally take that big leap by trying (yes TRYING) to get our itsy bitsy company up and running on Etsy and also to start a blog.

Our  'Etsy' shop was opened about 3 weeks ago now and we hope you'll take a peek at our shop (the link I am assured will appear somewhere on this page!)  At the moment we only have one item available in our shop which is a sewing kit for a range we have called 'Riverbank Farm' and the kit is called; 'Mr. Whiskers the Trug Maker & 'Who is Mr. Whiskers' storybook.' Kit No. 1.  


We are currently finalising four more kits that we hope to let loose on our Etsy shop as soon as we are happy with them.

 We thought we'd push ourselves to see what happens by jumping straight into world of the 'crafting blog' and we hope to entice you to craft with us.


Enjoy.